HOW TO START A MONEY-MAKING BLOG IN 7 EASY STEPS
Do you desire to start a blog the right way? Starting a blog can be a herculean task especially when you do not have any technical knowledge. This guide is designed to show you step by step how you can start a WordPress blog with no stress at all. The blog is comprehensive and detailed enough that even if you do not have any technical knowledge you will still be able to start and run a blog on your own.
The steps involved in setting up a blog are quite easy whether you are 20 years old or even 60. However, if you still feel you need help setting up a blog, you can contact our expert team on
Tel:2348033554405
Whatsapp: 2348026018143
Website: www.beyondwebsitedesign.com.ng
Watch an Introductory Video here:
What is a Blog?
A blog can be defined as a website or web page that is owned and run by an individual or an organization and is often updated from time to time. The conversational style is not too formal and more informal but a blog can be educative, informative, and even entertaining. Usually, the most recent posts are seen at the top of the blog. A blog
can also have different categories depending on the areas of interest of the owners of the blog.
What is a Content Management System?
A content management system can also be defined as a web application usually used to manage the design and develop web content such that more than one person with the appropriate privileges can be allowed to create, edit and publish. Usually, the contents are stored in a database.
|
|
|
REQUIREMENTS FOR STARTING A WORDPRESS BLOG
As highlighted in this tutorial earlier the whole idea is to keep everything as simple as possible.
- You need a domain name which is the unique name that will identify your blog on the World Wide Web.
- A Webhosting account. This is where your website files and images will be stored on the internet.
- A cup of coffee
You can start a blog in just a few minutes and this guide will simplify the entire process for you step by step.
Whenever you need to start or set up a blog, one of the greatest mistakes that can ever be made is using the wrong blogging platform. Many people prefer to use wordpress.com, a free hosted service, and it is actually a very simple platform to start with. WordPress .com saves you the cost of getting hosting and domain and might be a very good place to start your blogging career right away. With the free WordPress blog, you can actually design your blog, do a little bit of customization and at the same time start making money from your blog. While the free WordPress .com is a cool place to start, the hosted version is actually much better because it is more flexible and you can actually customize the look and feel to your own taste.
What is WordPress?
WordPress is a free content management system that can be used to build different kinds of websites ranging from blogs to full business websites or even an online store.
For you to use WordPress, even though it is free you will need what we refer to as a domain name and a website hosting service.
What is a Domain Name?
A domain name is a unique name that identifies your blog or business in the internet space. A domain name is what people type to access your website on the internet. e.g. www.mycompanyname.com. So after getting a domain name, you also need what we refer to as Webhosting.
What is Website hosting?
Webhosting is actually what makes your website accessible to users all over the world. Webhosting is actually a server that hosts all your files on the internet. it is the home where your website resides.
How to Buy a Domain Name and Website Hosting.
To buy your domain name and website hosting you can follow the steps below:
Sign up now with Bluehost using this link Bluehost
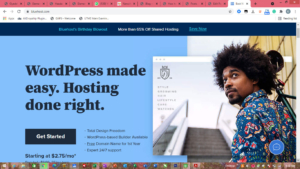
Click on get started
Select the plan you need (I will choose a basic plan)
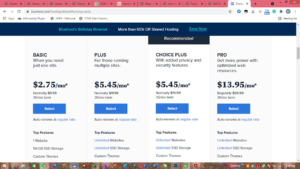
Enter your domain name
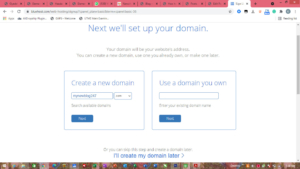
Click next to check for availability
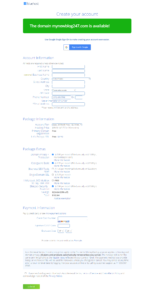
Now go ahead and sign up filling in the information with your card details below. Once the process is completed successfully you will receive an email with your control panel details.
AN OVERVIEW OF CONTROL PANEL
The control panel login details are usually sent to your mail once you make payment for your hosting and domain. The control panel makes it possible for you to manage your web files and resources on the internet. It also makes it possible for you to create email accounts to manage your domain. A short video on the control panel is also seen below:
How to Install WordPress on Bluehost
When you create a Bluehost account using this link, The customer care team at Bluehost will automatically install WordPress for you. This initiative was taken to make it easier for non-techy users to create their blogs. All that is required of you is that you log in to your Bluehost account and then click the Login to WordPress Button to get started. WordPress can also be logged into by going through your WordPress admin page directly.
You can use this URL: www.yourcompanyname.com/wp-admin
What is a WordPress Theme?
WordPress themes are actually what determines the look and feel of your website. It determines the colors, font designs, and styles that your WordPress blog takes on. The first time you install WordPress, the visual appearance of your WordPress website will be installed with the default theme that comes with WordPress.
Choosing a WordPress Theme
There are different options available to choose a WordPress theme.
- PRE INSTALLED FREE THEMES: There are preinstalled themes that you could make use of and possibly customize.
- PAID THEMES: There are also paid themes that you could buy install and customize.
How to change the appearance of your WordPress theme
You can change the appearance of your theme by doing the following:
Log in to your WordPress backend using your username and password.
Click on appearance and select themes as shown in the diagram below
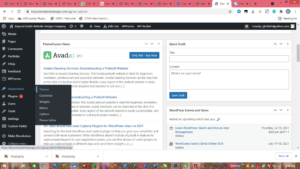
Click on add new as shown in the diagram below
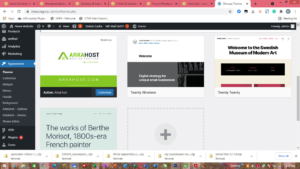
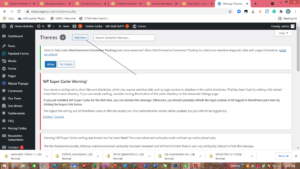
On this page, you see a list of pre-installed themes that came with the default WordPress installation.
Click on Add New and this will take you to a page that shows you a list of free themes that comes with WordPress as shown below.
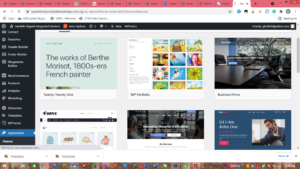
click Click on any one of them to install. If you have a third-party theme you can use the upload theme option to install your third-party theme.
After successfully installing the theme of your choice, click on activate to make the theme active on your website. Once your WordPress theme is selected you can go ahead and create your first blog post.
Understanding WordPress Plugins
WordPress plugins are used to extend the core functionality of your blog or website.
Blog Categories Explained
When creating a Blog, you have the opportunity of creating different categories for your blog especially if your Blog will be covering more than one niche. Although it is usually advisable your blog focuses on the niche. Examples of Blog Categories can be News, ENtertainment, Sports etc. depending on your area of interest.
Creating Your First Blog Post
To create your first blog post you can do the following:
- Click on posts
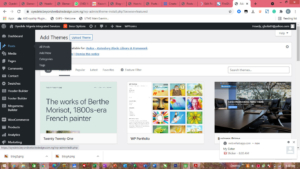
Click on add new as shown below
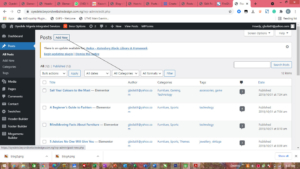
Add the title in the title section
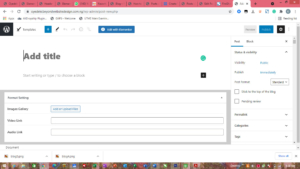
In the content, area type your content
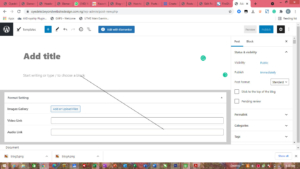
Click on Publish to publish your first WordPress post
What are WordPress plugins?
WordPress plugins are usually used to extend the core functionalities of your WordPress website. Plugins can be used to add extra functionalities such as contact forms, newsletter subscriptions, galleries, etc. Basically what a WordPress plugin does is that it adds extra features to your website to make it possible for you to achieve your website goals without writing a single line of code.
HOW TO ADD A CONTACT US FORM – WORDPRESS PLUGIN EXAMPLE
A contact us form plugin will be used to achieve this. What the plugin does is basically add a contact us form that your visitors and potential clients can fill to your contact us page.
To add a contact us form to your page, do the following:
From your WordPress backend do the following:
- Click on Plugins as shown below
- Click on Add New
- In the search for plugins search box type, “wp forms” and search
- Click on install wp forms as shown below
- After installing successfully click on Activate
The plugin is activated for use as shown in the diagram below
To configure the plugin do the following:
Click on create your first form as shown in the diagram below:
Then click on create a simple contact form as shown below
Your contact form will display as shown below:
Click on save to save the form.
Take note of the shortcode of the form as highlighted below. The shortcode will be used to display the form on your Contact Us Page.
How to create a Page or Contact Us Page
You can follow the following steps to create a contact us page as shown below:
Click on pages
Then click on Add New
Enter a page title as shown below in this case, contact us.
Paste the shortcode of the form in the content area.
Click on publish

